DIY SYNTHESIZER | LIGHT THEREMIN
I’ve spent a few months designing and hacking up a variety of circuits then soldering into the wee hours of the night to make my own analog sound machines. It’s been therapeutic during the pandemic and tons of fun.
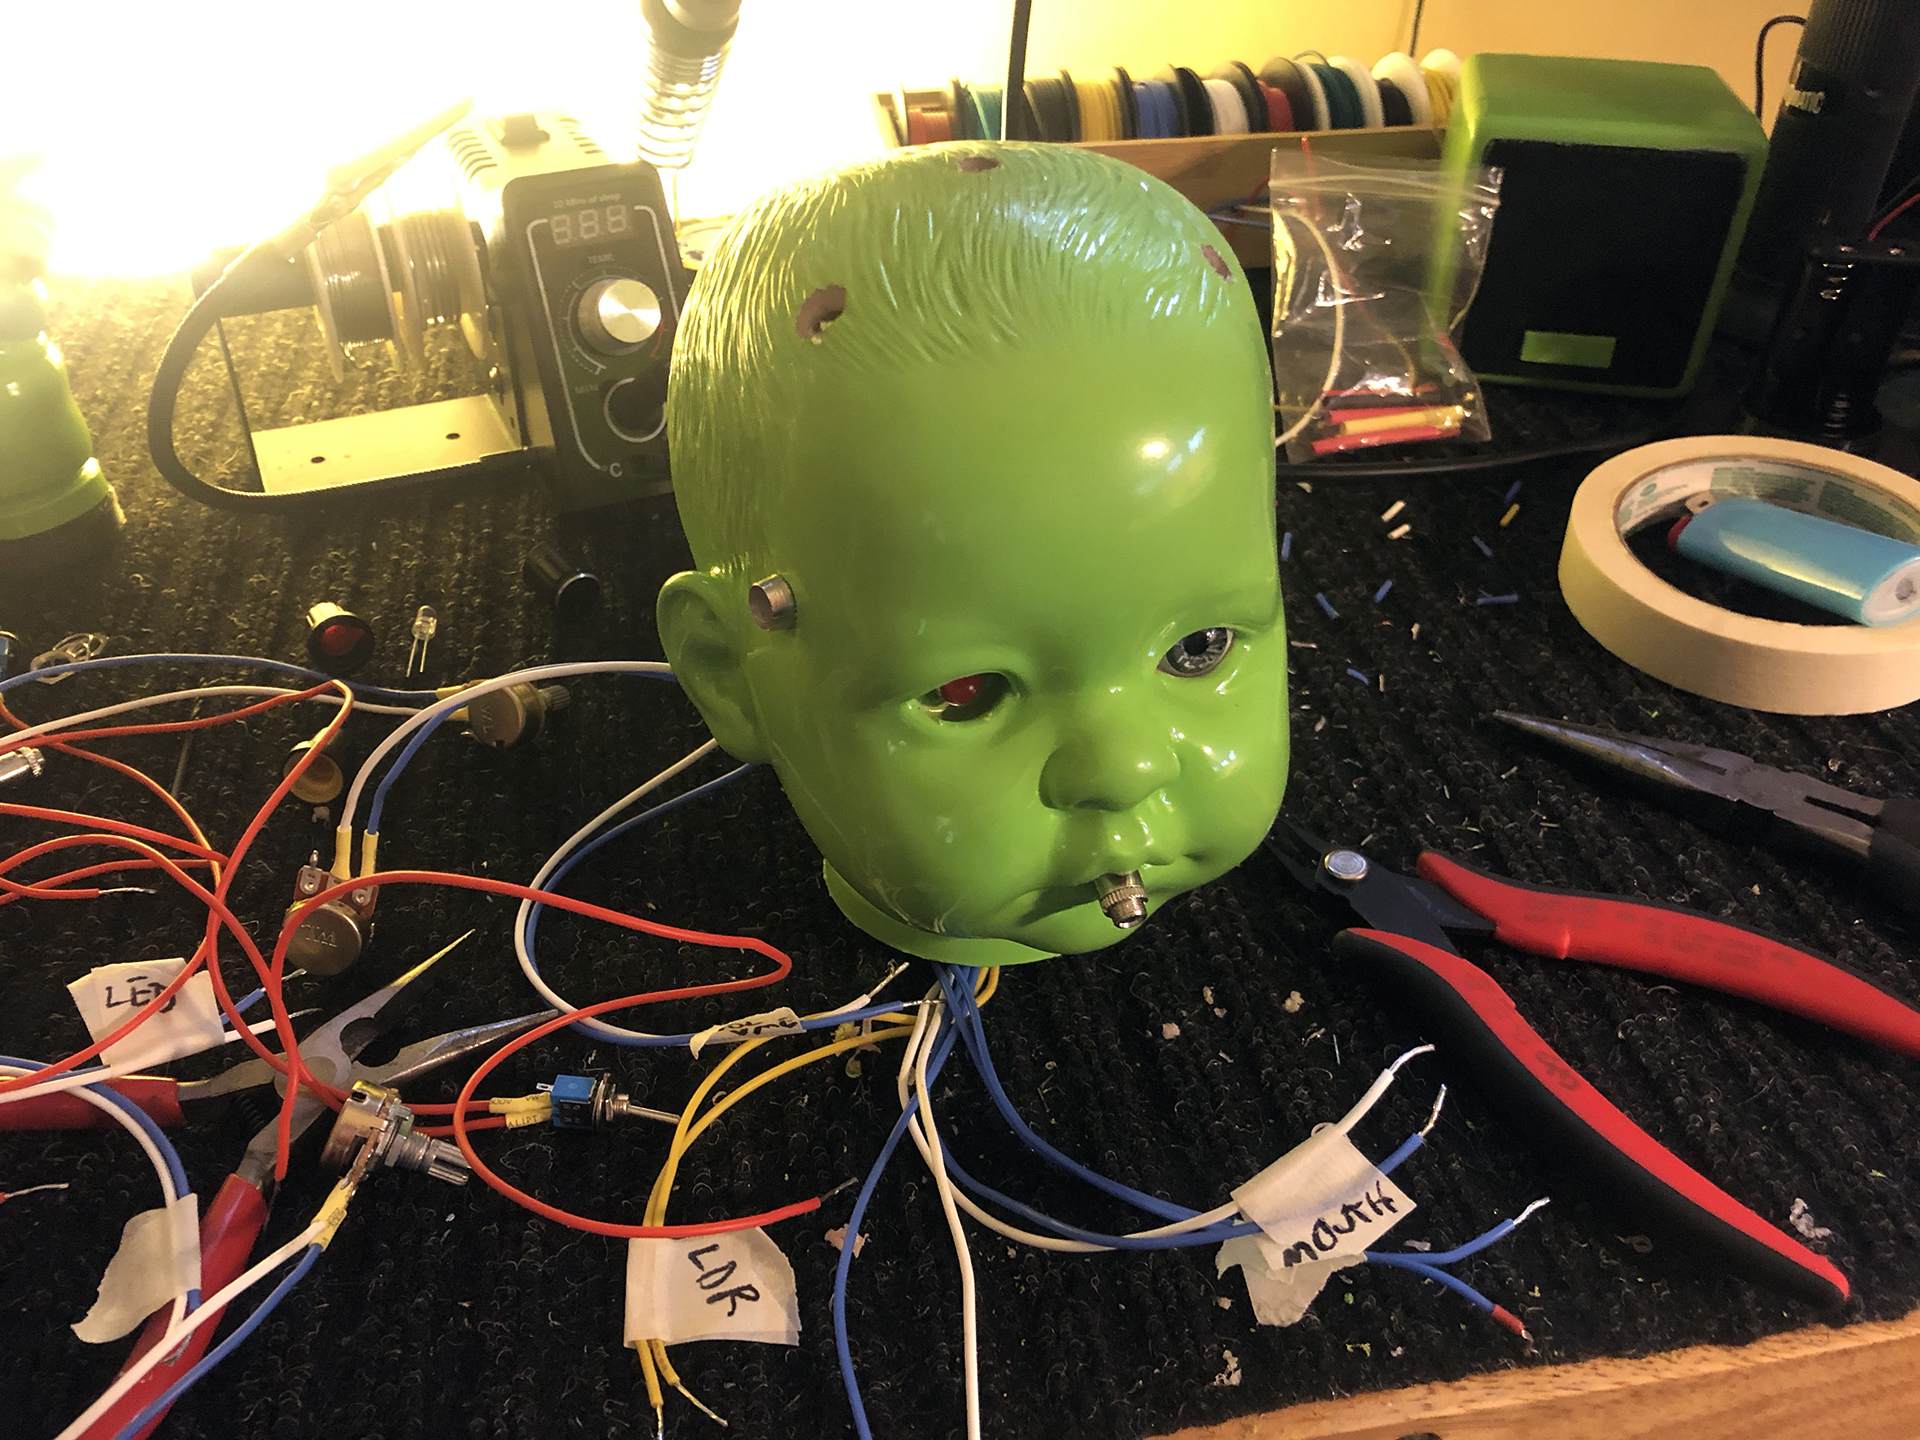
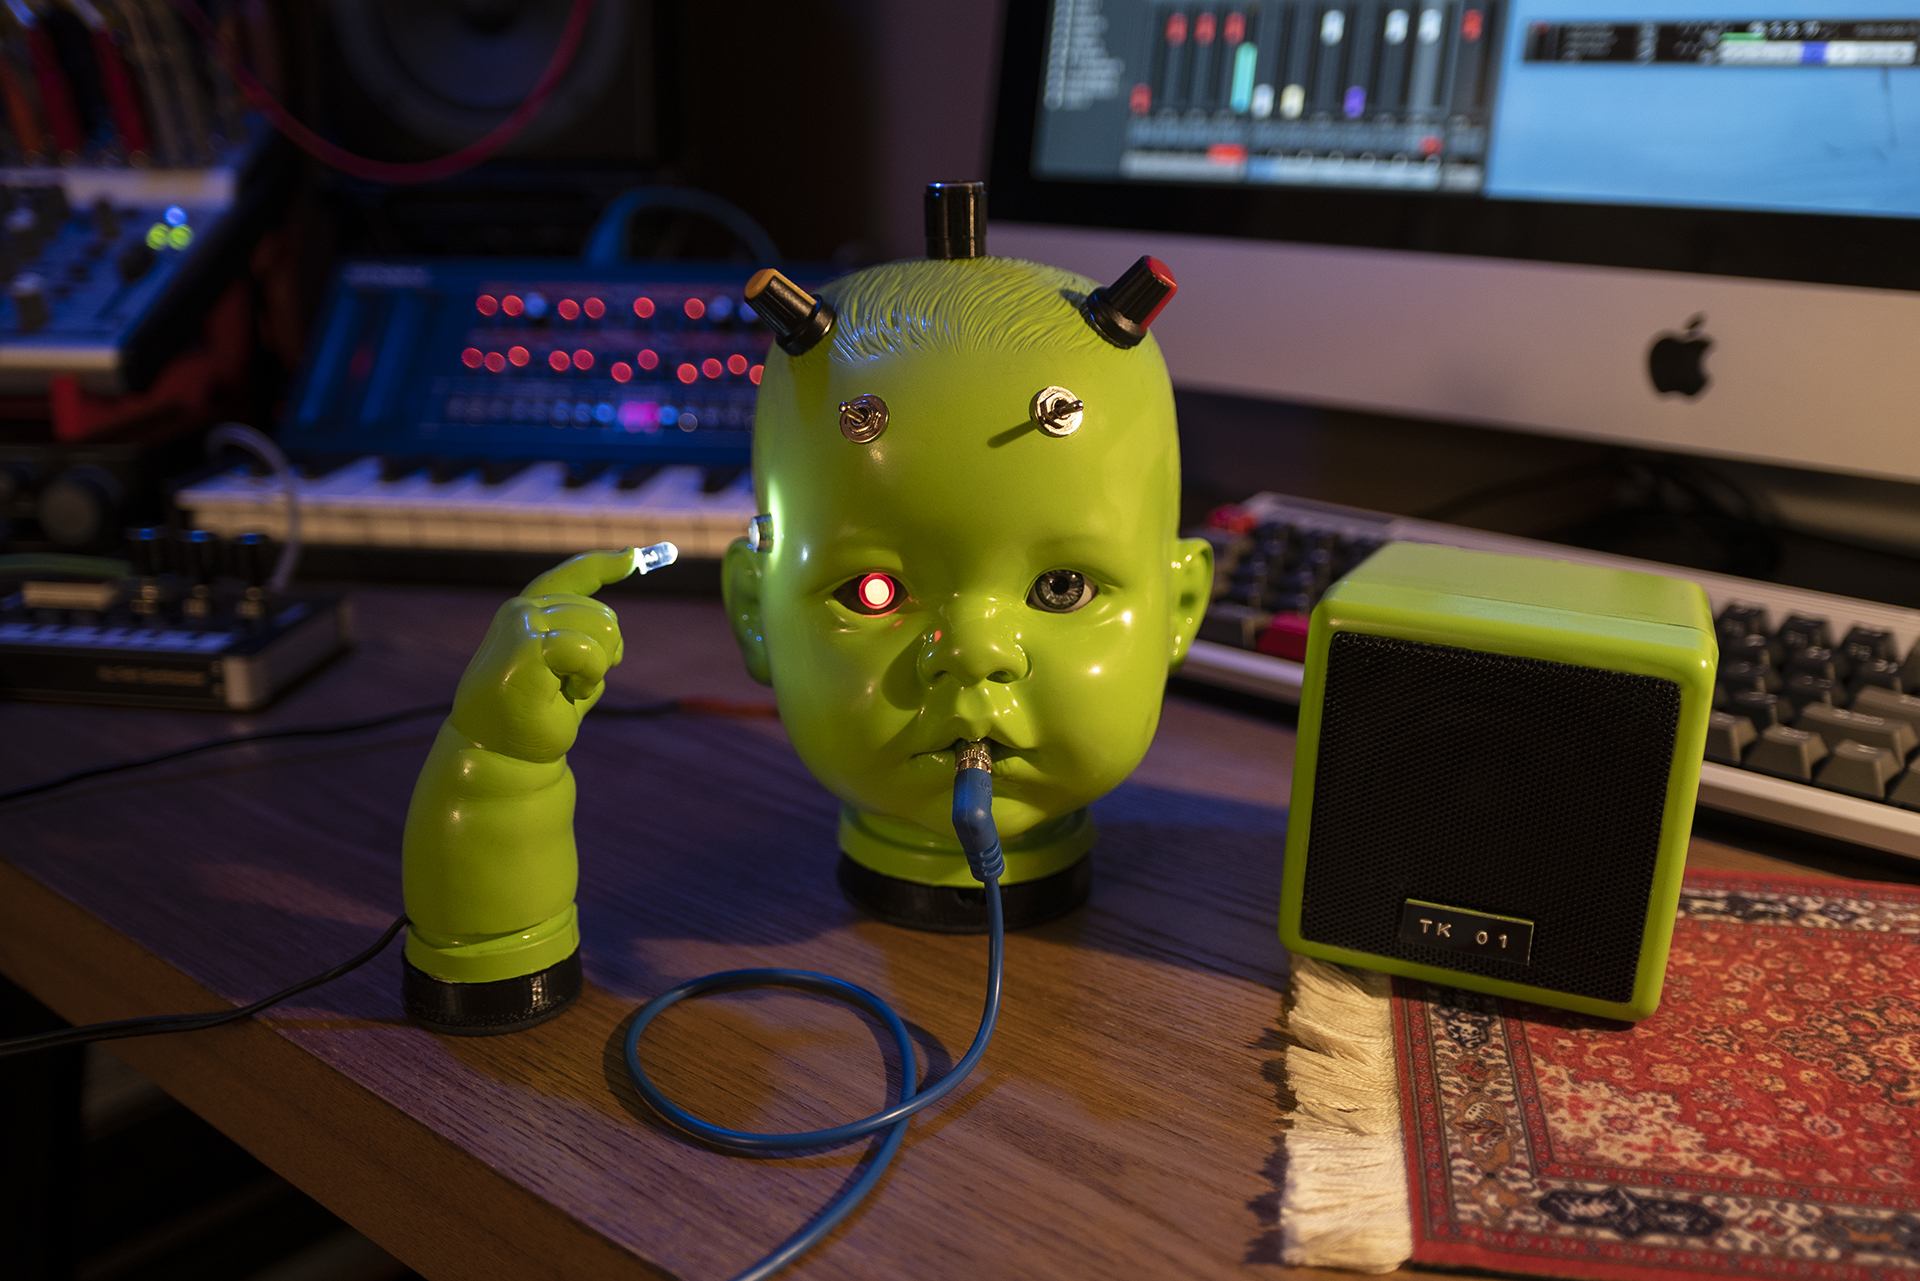
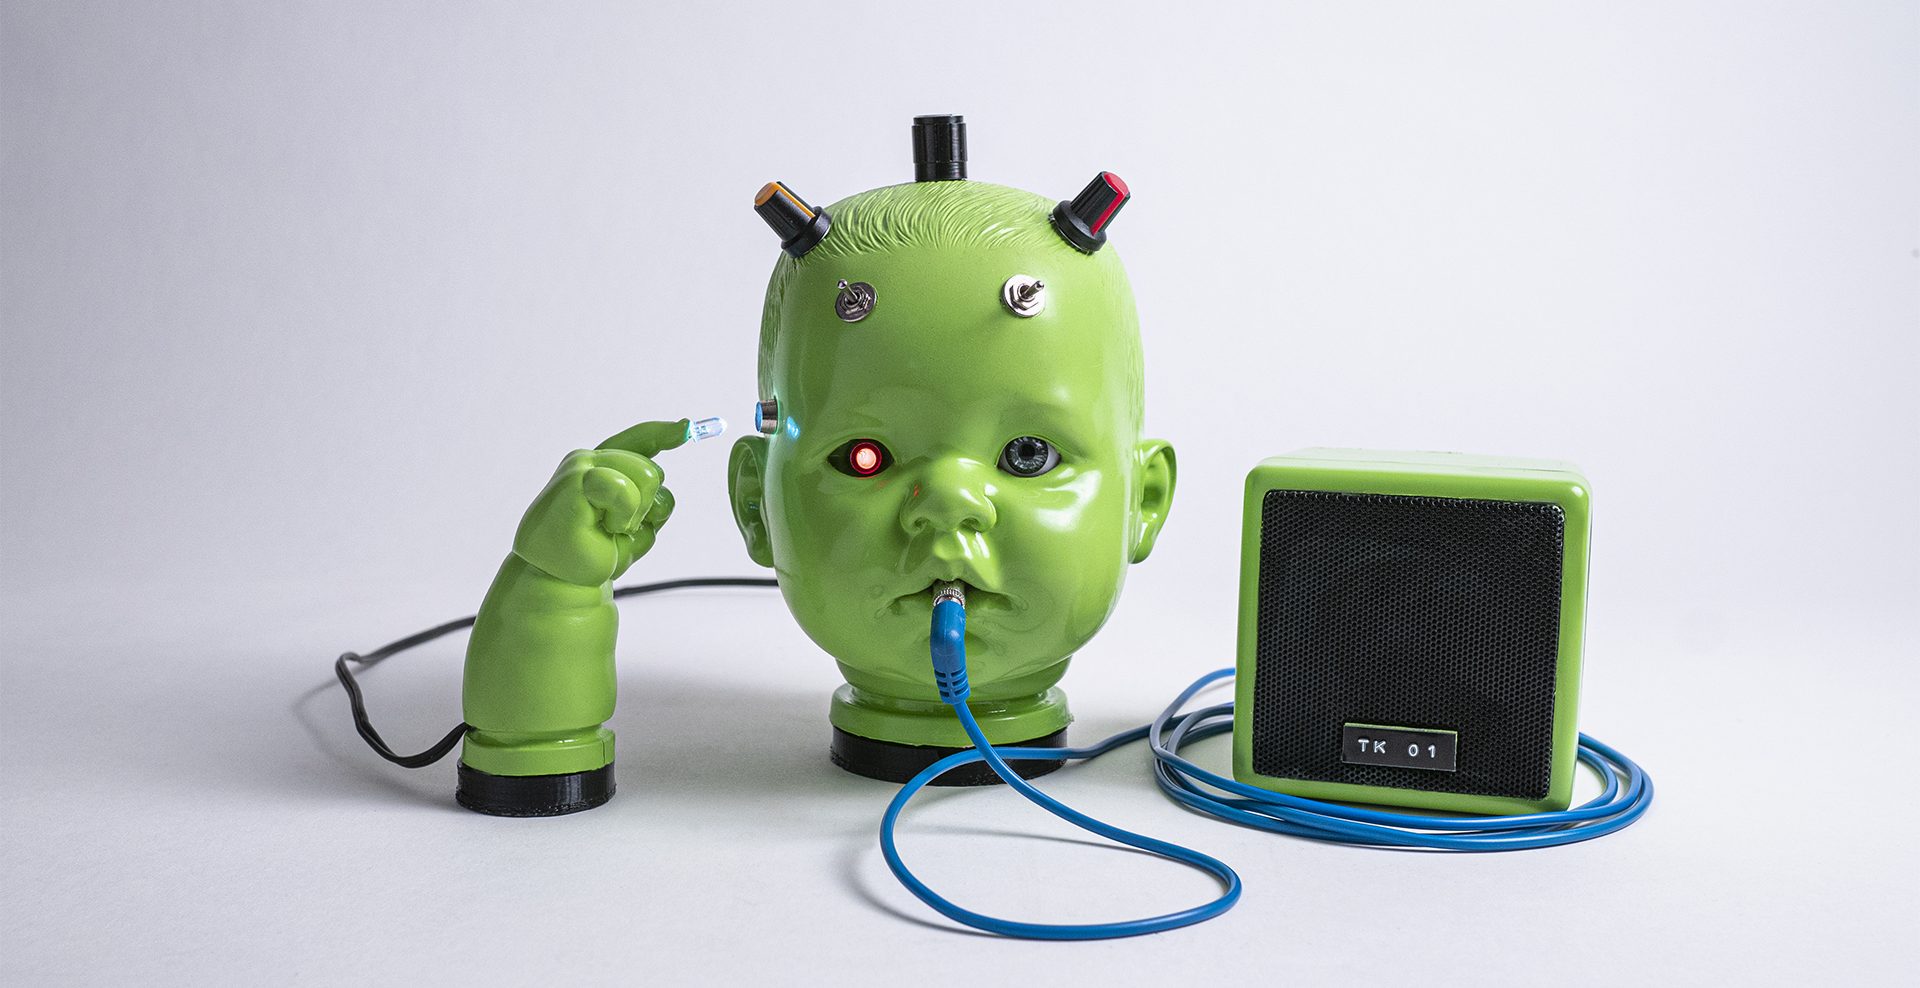
Researching other designs, I discovered plenty of inspiring and creative enclosures for DIY synthesizers. Especially struck by “Baby Bots”, I set out to make one. My next project was a light theremin anyway, so I took a trip to the thrift store. After an awkward conversation with the cashier why an adult man had an armful of used baby dolls, I was on my way. I’ve since learned a lot about what to look for in a baby doll carcass before jamming a synthesizer into it.
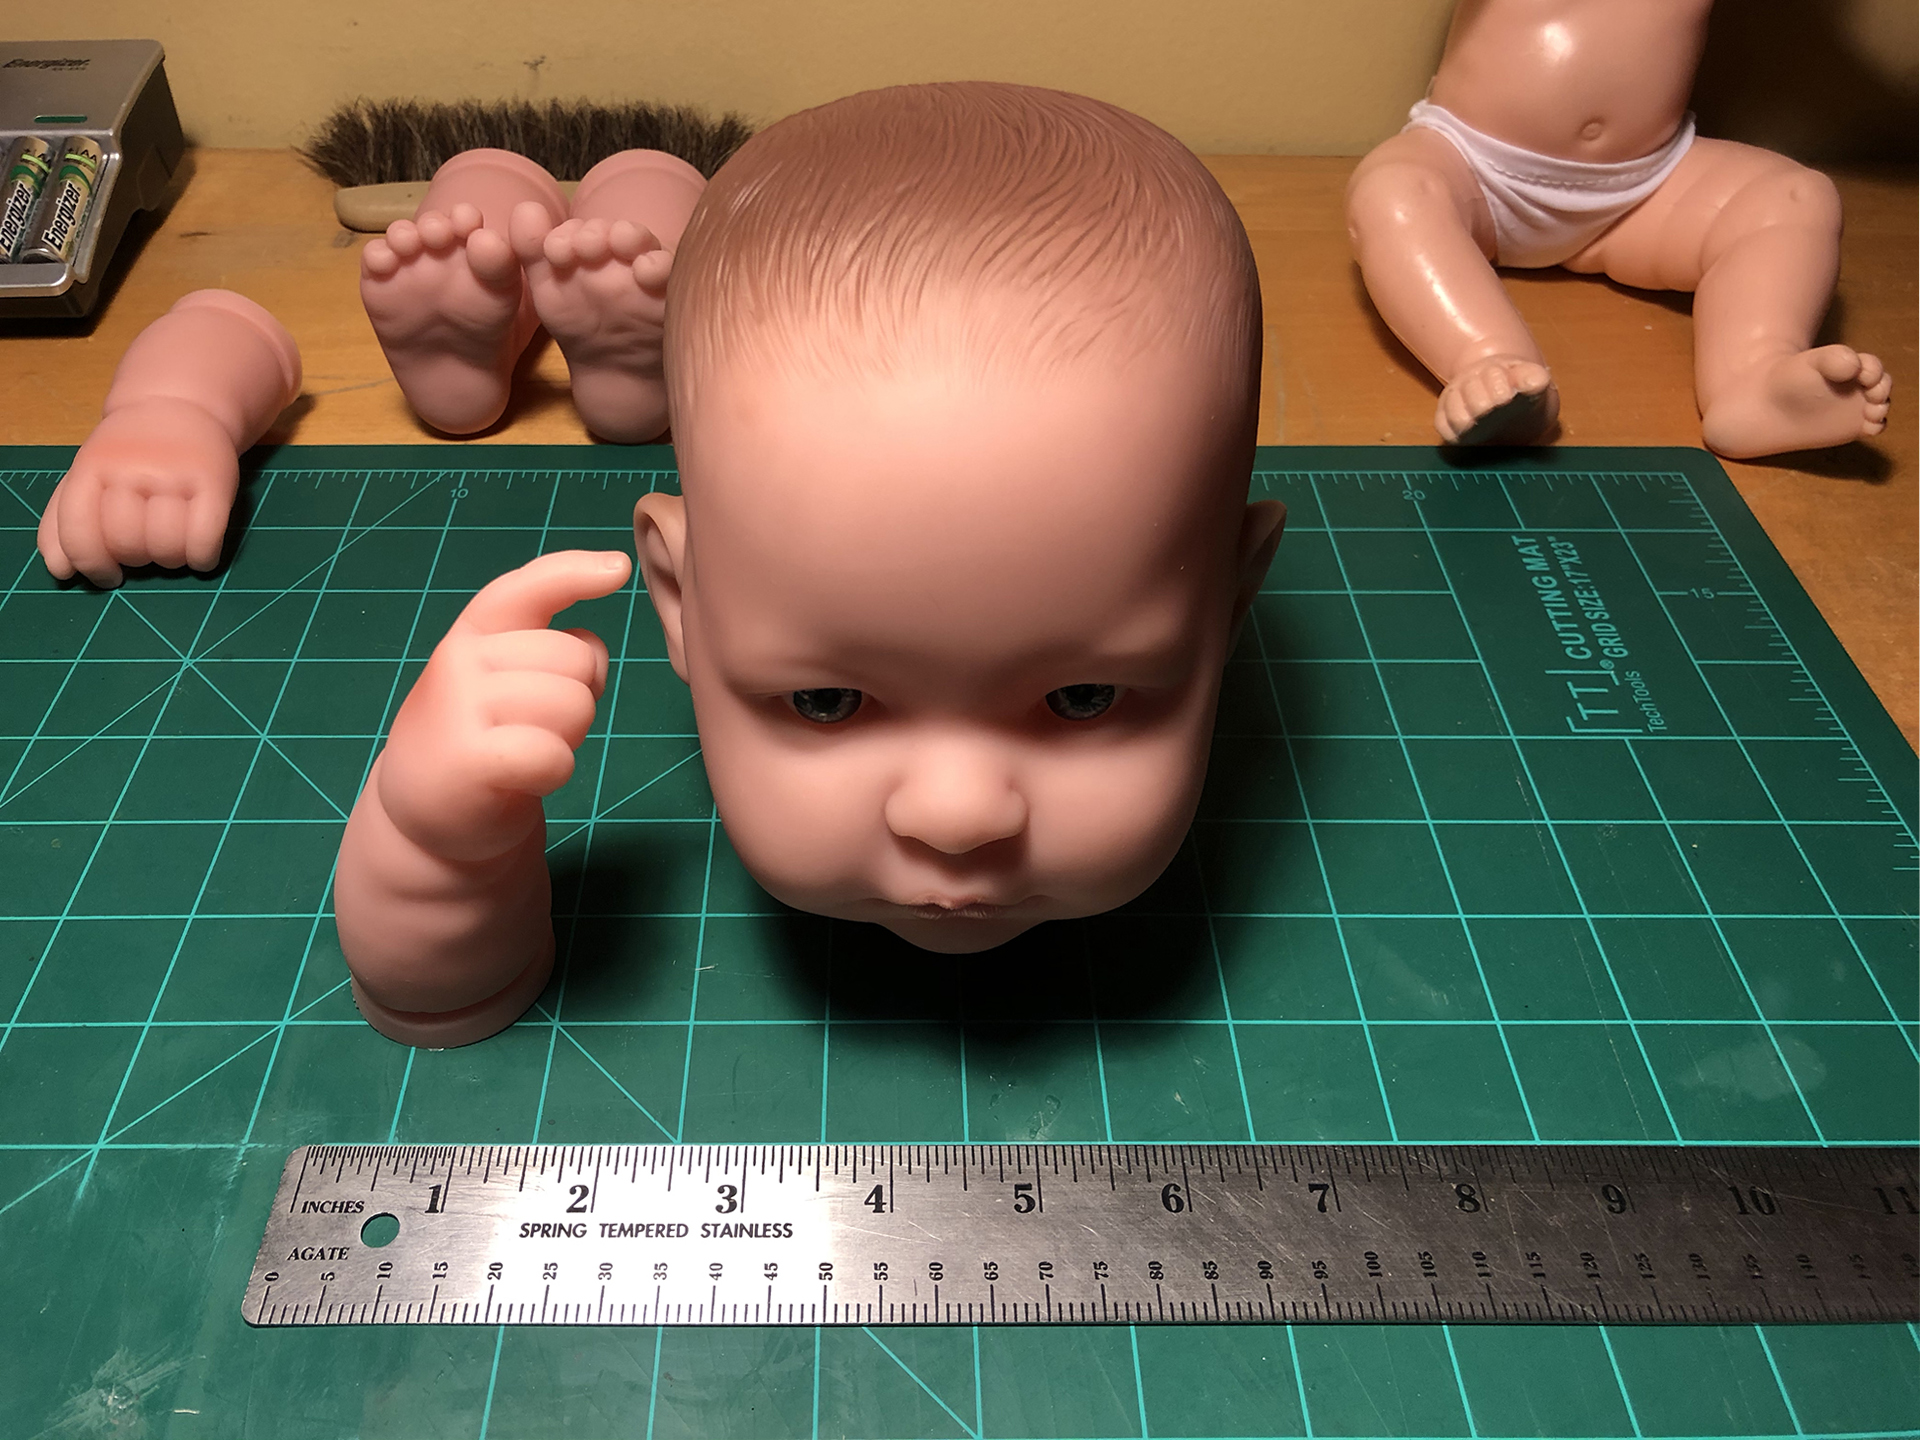
I chose a toxic green color and after a little masking, I was off to the spray paint races. I underestimated how unforgiving vinyl is for drilling though. You want a quarter inch hole and you choose a quarter inch bit, but, yeah, it doesn’t work that way with baby doll skin. Who knew? Also, super tiny hands woulda been nice for squeezing potentiometers and little toggle switches up in that head. After some trial and error, I found the right tool to overcome my chubby sausage mittens. Super long, needle nose, vice-grips are your friend.
I hopped into Fusion 360 and banged out a quick base for the head and the hand and fired up the 3D printer. The head’s base also integrates the battery holder and makes for easy access to swap out the AA batteries (it’s a 3v circuit so there’s two of them).
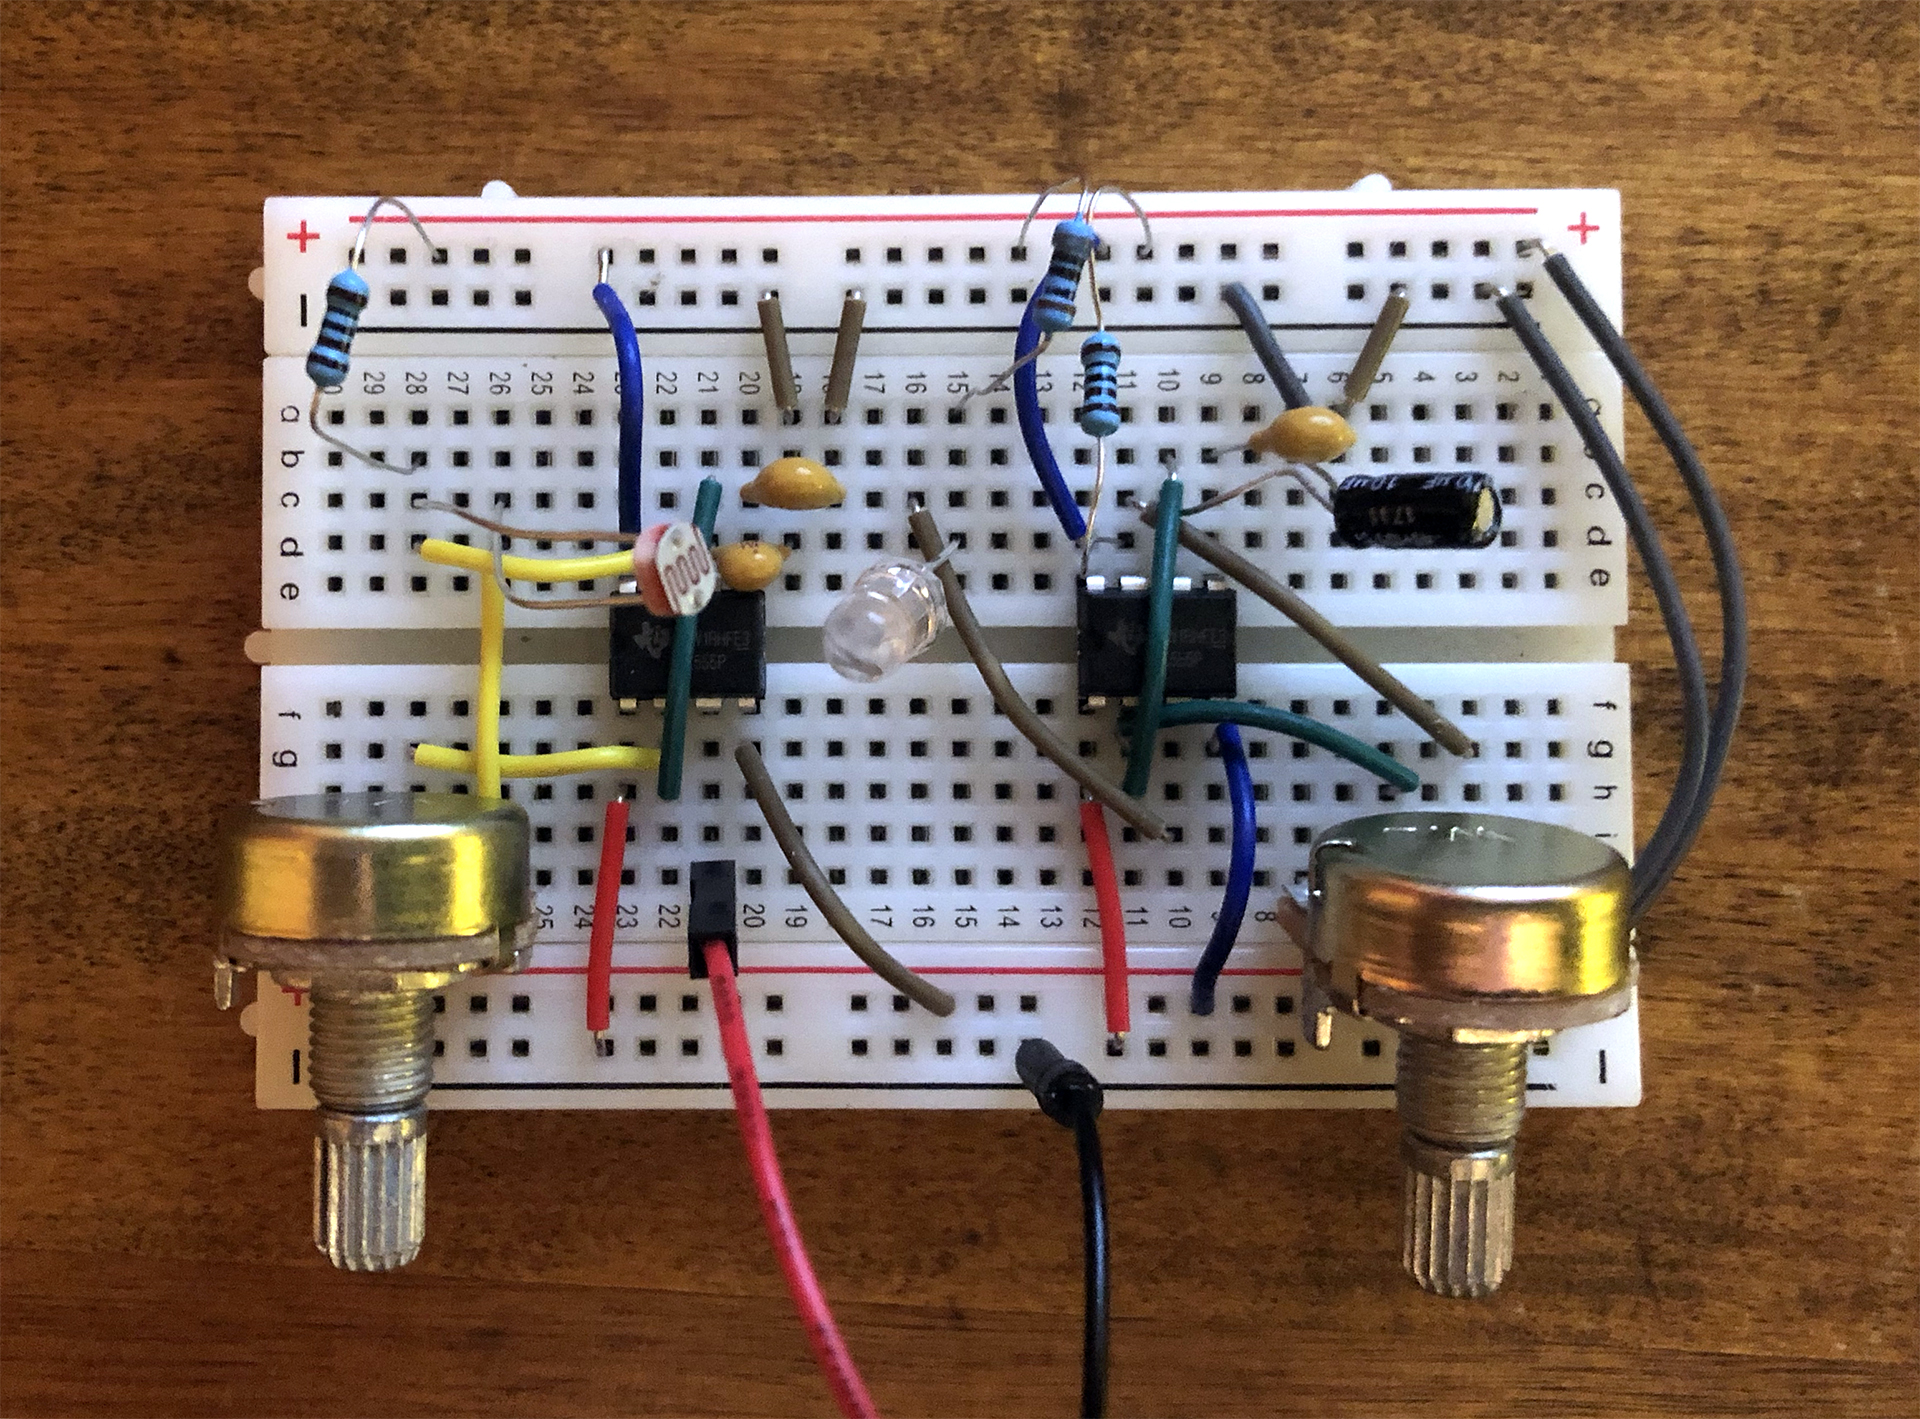
This is a pretty simple dual 555 IC based circuit with a few capacitors and resistors creating two square wave oscillators. Once I worked out the circuit diagram, soldering the components in place on stripboard was fairly straightforward. It could have potentially been confusing tracing all the wires from the head back to the board for final assembly though. Imagine a decapitated C-3PO. Luckily, I had placed little pieces of tape on each wire labeling where it was coming from and where it was supposed to go so I didn’t get too lost in all the spaghetti.
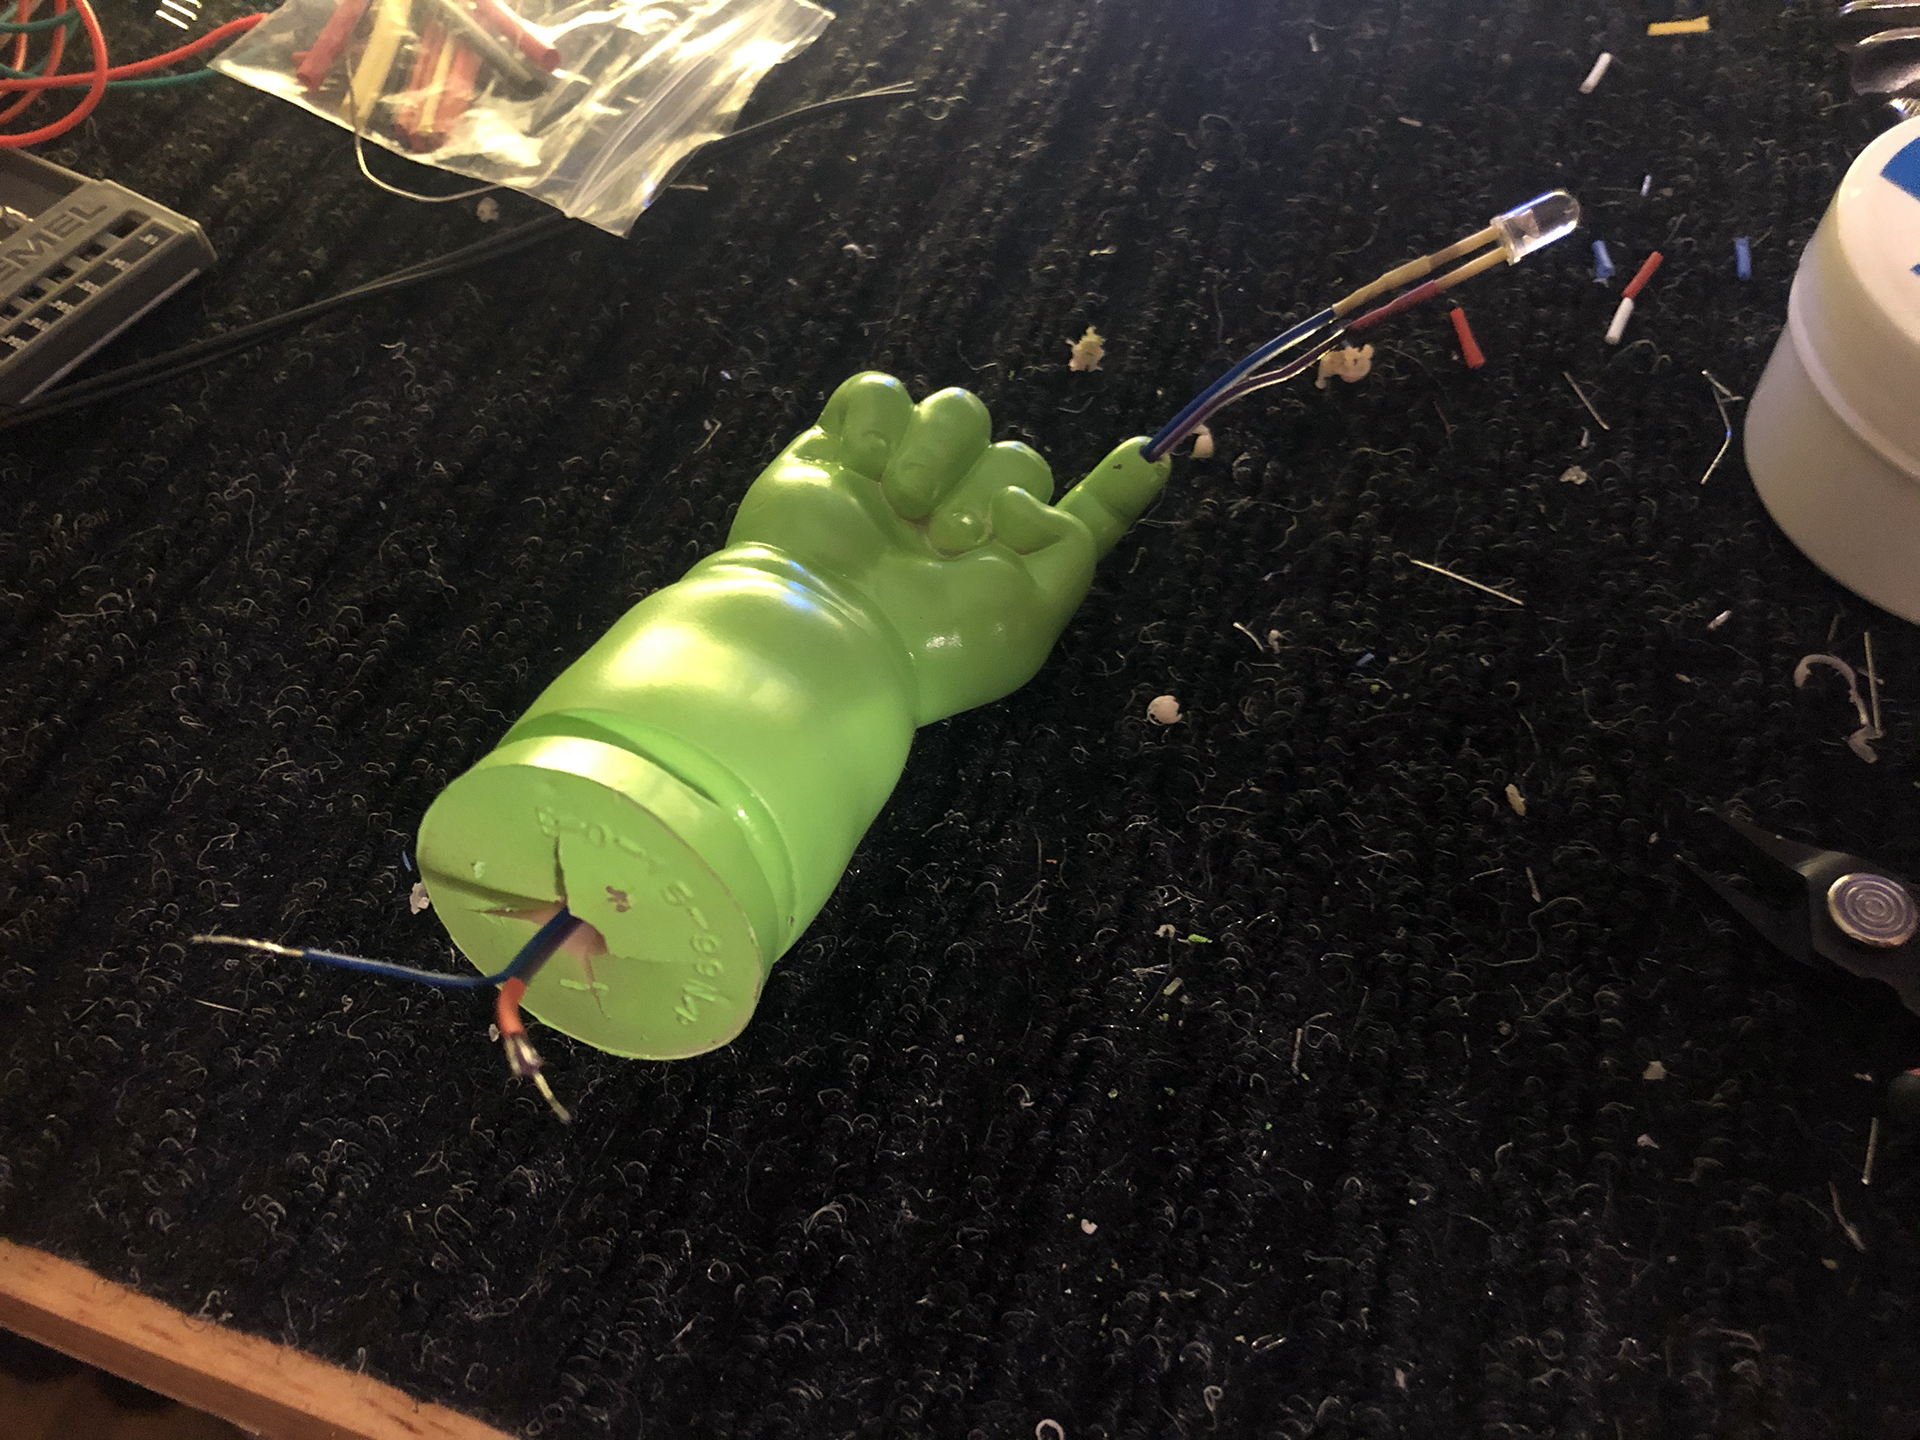
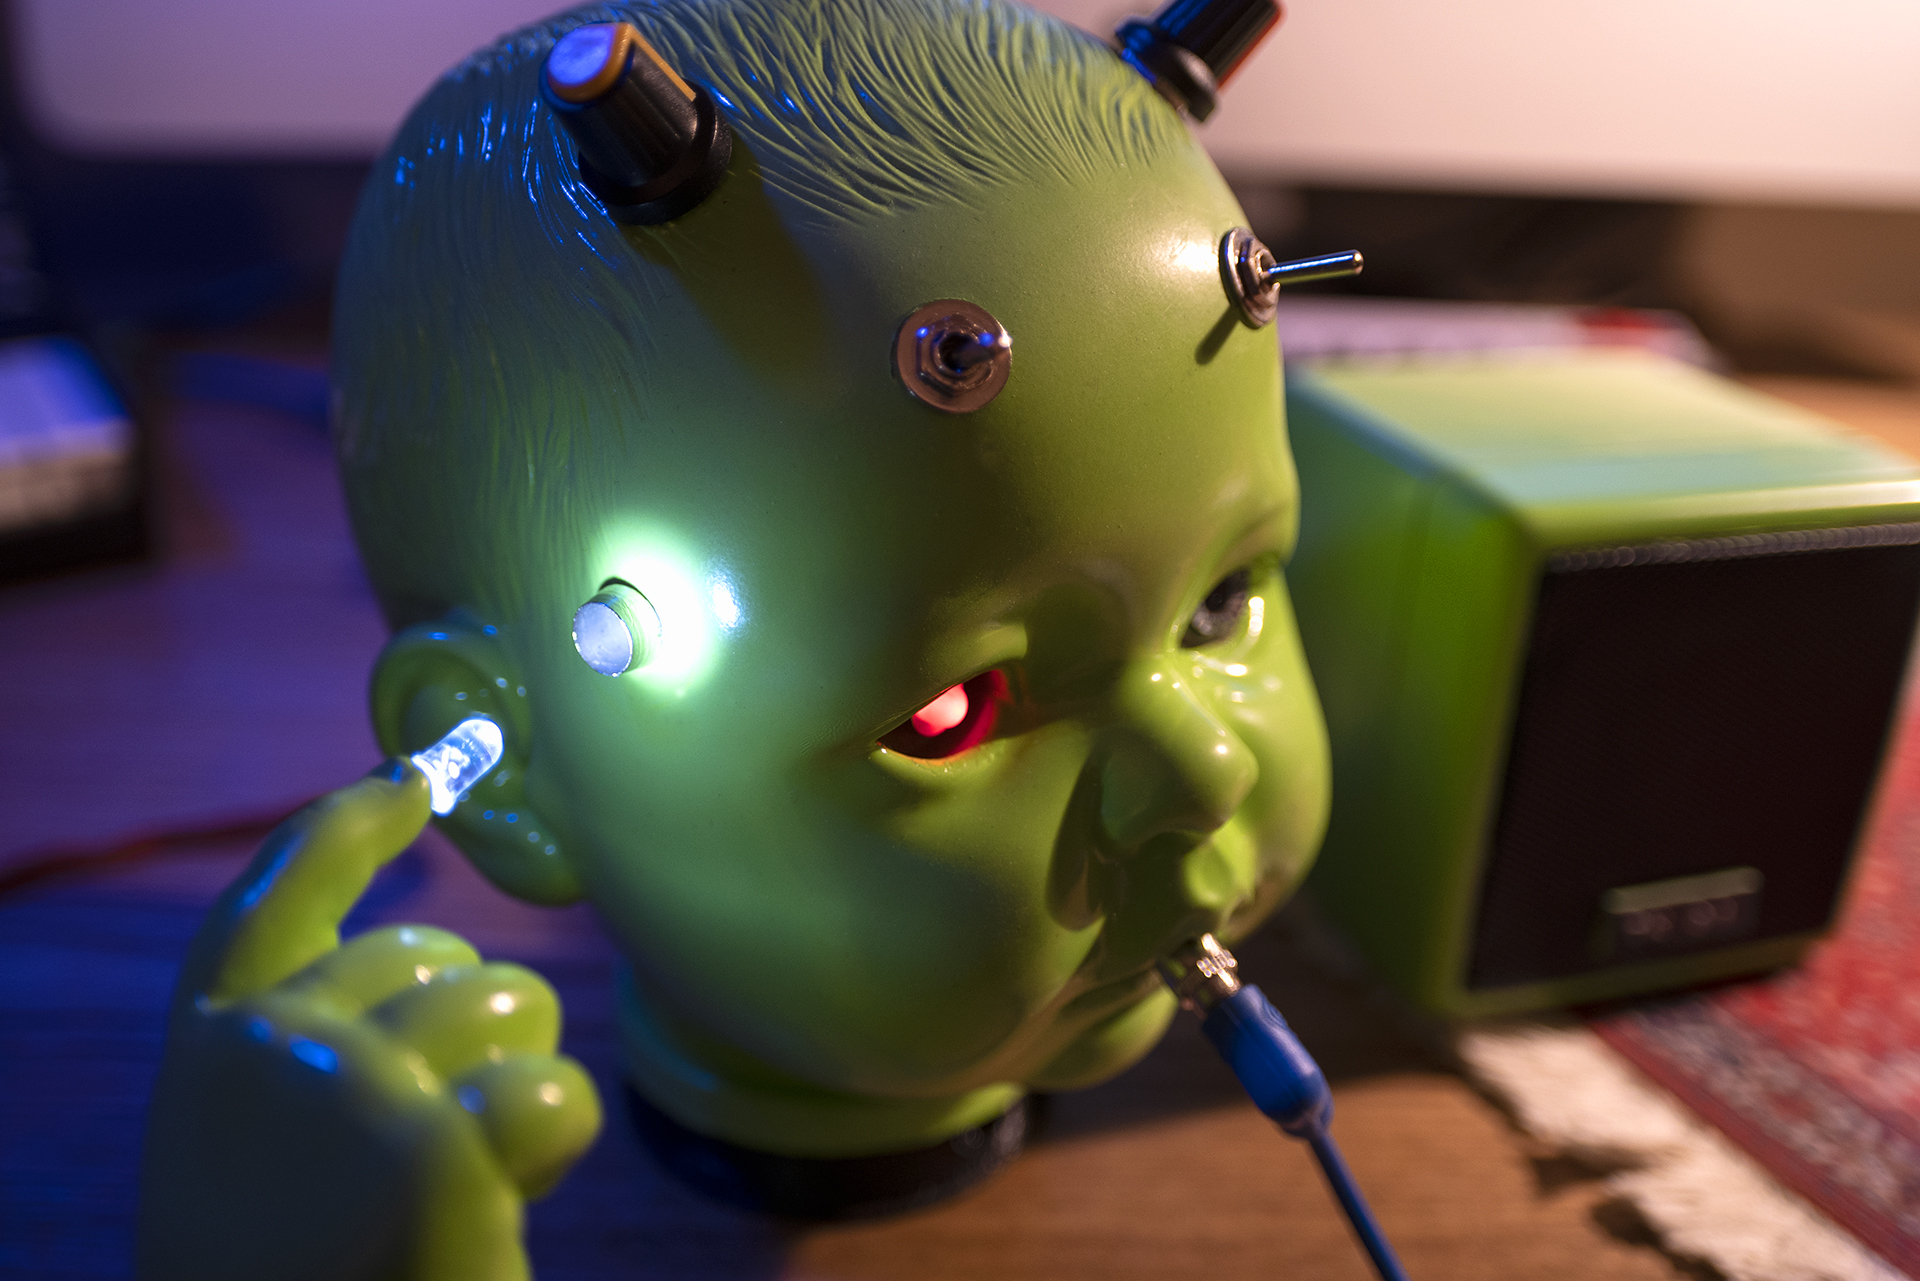
The final product is pretty fun and sounds kickass with a tiny bit of delay from my Korg NTS-1. Check out the demo video above. There are two potentiometers that vary the pitch and the oscillation speed of the LED in the finger. That LED is used to get the theremin “wobbly” effect through the light dependent resistor on the bot’s temple. The third and center pot is a volume control when using the speaker for on-the-go noise making. The output hovers right around line level when plugged into my mixer. The 3.5mm jack in the mouth is the output. There’s another 3.5mm jack on the back of the head for easily removing the hand connection. Technically, those could be considered voltage control outputs and oscillate another unit or effect. Modular!